
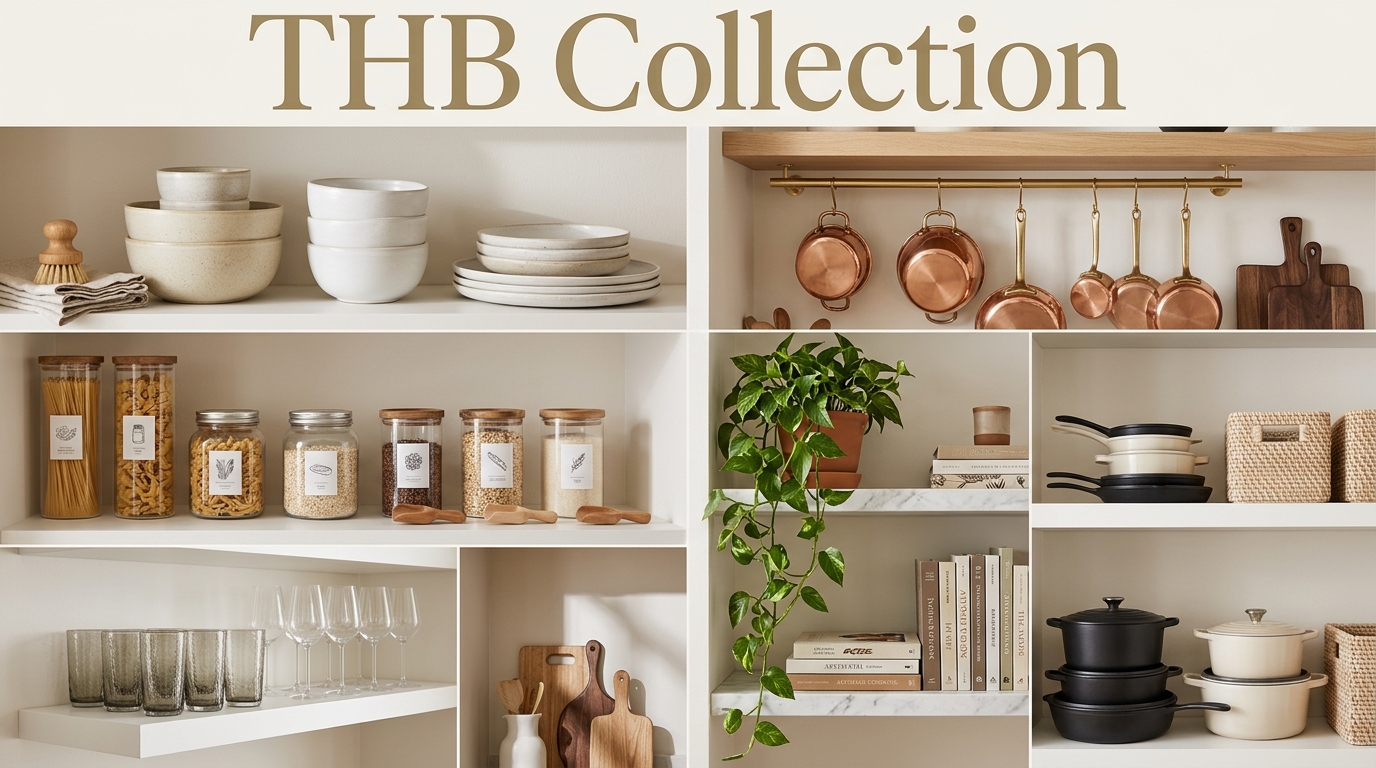
Removing upper upper cabinets in favor of open shelving is one of the most refreshing ways to modernize a kitchen, but keeping those exposed boards looking stylish rather than messy is a daily balancing art. When every plate, bowl, and glass is out in the open for everyone to see, simple everyday clutter can quickly overwhelm the visual harmony of your home. By exploring these 22 kitchen shelf styling ideas, you can learn how to turn basic storage into a stunning, magazine-worthy architectural feature that makes your cooking routine feel organized and intentional, taking cues from trusted home design guides along the way.
The real secret to mastering open shelving is finding the sweet spot between daily functionality and curated aesthetic charm. You never want your shelves to look like a sterile, untouchable showroom display, but you also want to avoid letting them become a dumping ground for mismatched tupperware and plastic cereal boxes. When you intentionally mix textures, stick to a disciplined color scheme, and use clever spatial layering, your shelves become a dynamic focal point that adds warmth and character to your entire main level. Whether you have a rustic farmhouse layout or a sleek contemporary cooking space, these actionable styling strategies will help you create a beautifully balanced display that stands up to real daily life.
1. Stick to a Cohesive 3-Color Palette
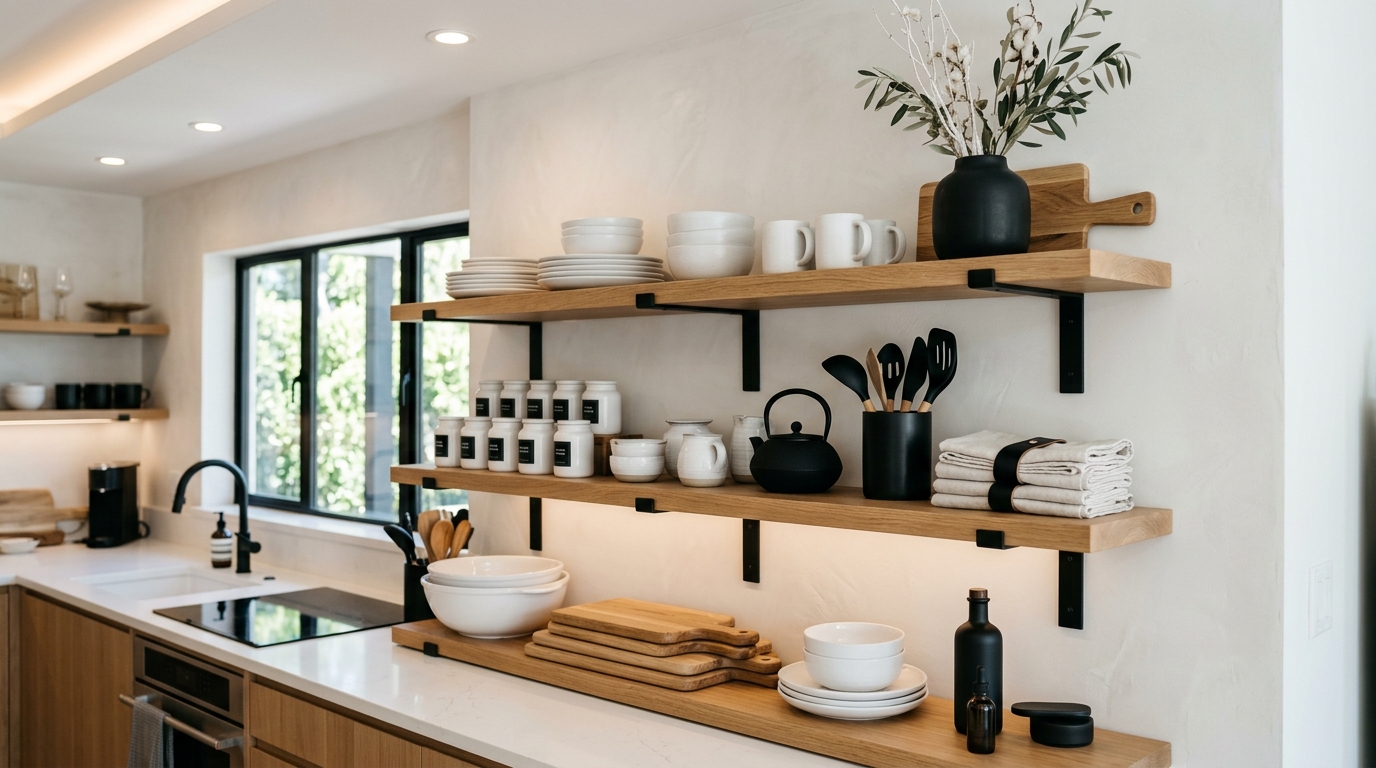
The fastest way to make open shelving look chaotic and overcrowded is displaying a rainbow of mismatched dishware, bright coffee mugs, and colorful food packages. To keep your wall visually calm and sophisticated, establish a strict three-color palette for everything that sits on your open boards. A classic combination might include crisp white stoneware, natural wood accents, and subtle touches of sage green or matte black. When every item within sight adheres to this tight color story, the individual pieces naturally flow together into a unified display. This simple discipline allows you to mix different shapes and brands of dishware without sacrificing clean, organized design.
2. Balance Everyday Function With Decorative Art
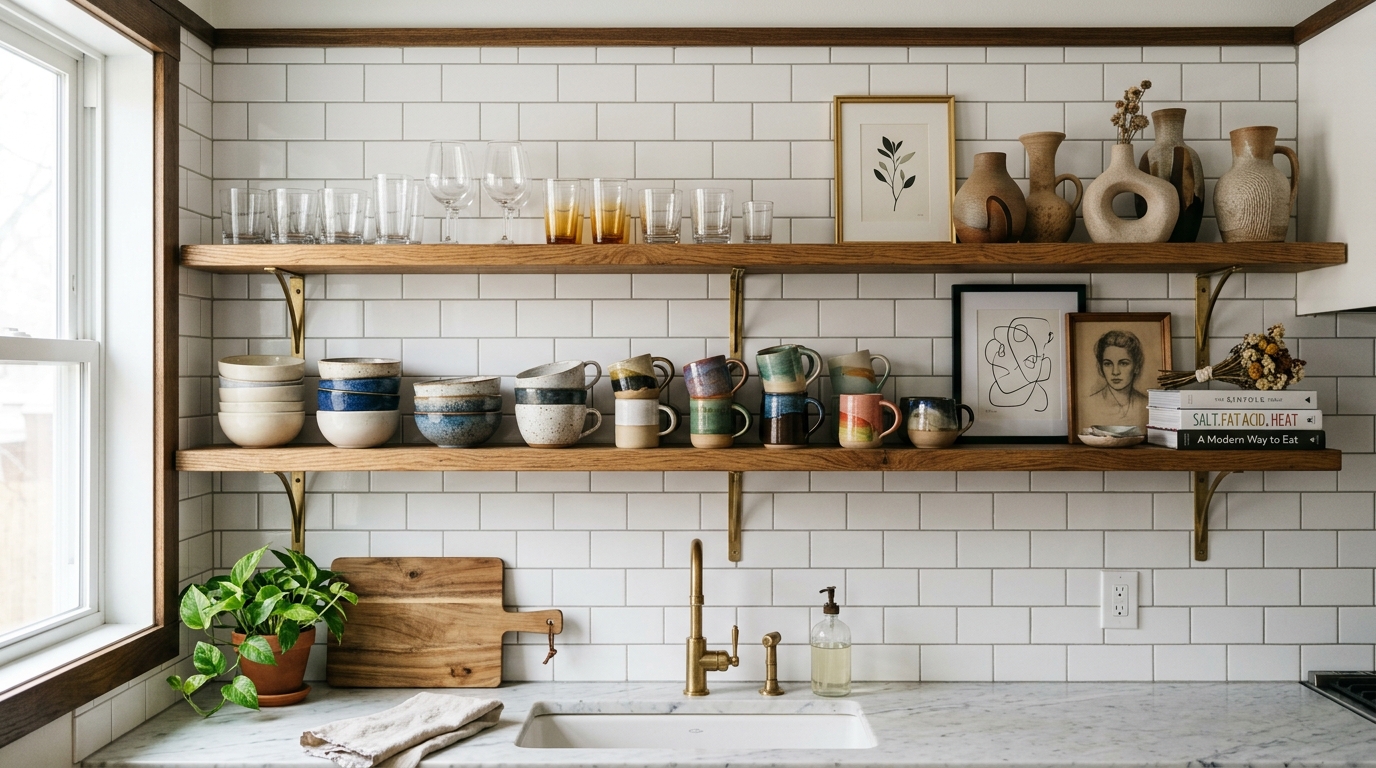
Open shelving should never be purely decorative or entirely utilitarian; the magic happens when you strike a realistic balance between the two. Designers often recommend the 60/40 rule: let 60% of your shelf space hold everyday functional items like drinking glasses, cereal bowls, and coffee mugs, while dedicating the remaining 40% to decorative elements like sculptural vases and framed art. This arrangement ensures your kitchen remains a working, practical space while still offering moments of visual beauty. Placing your most-used items alongside a handcrafted clay pitcher or against crisp white cabinetry creates an approachable, lived-in atmosphere that feels both authentic and highly styled.
3. Group Items in Odd Numbers for Visual Flow
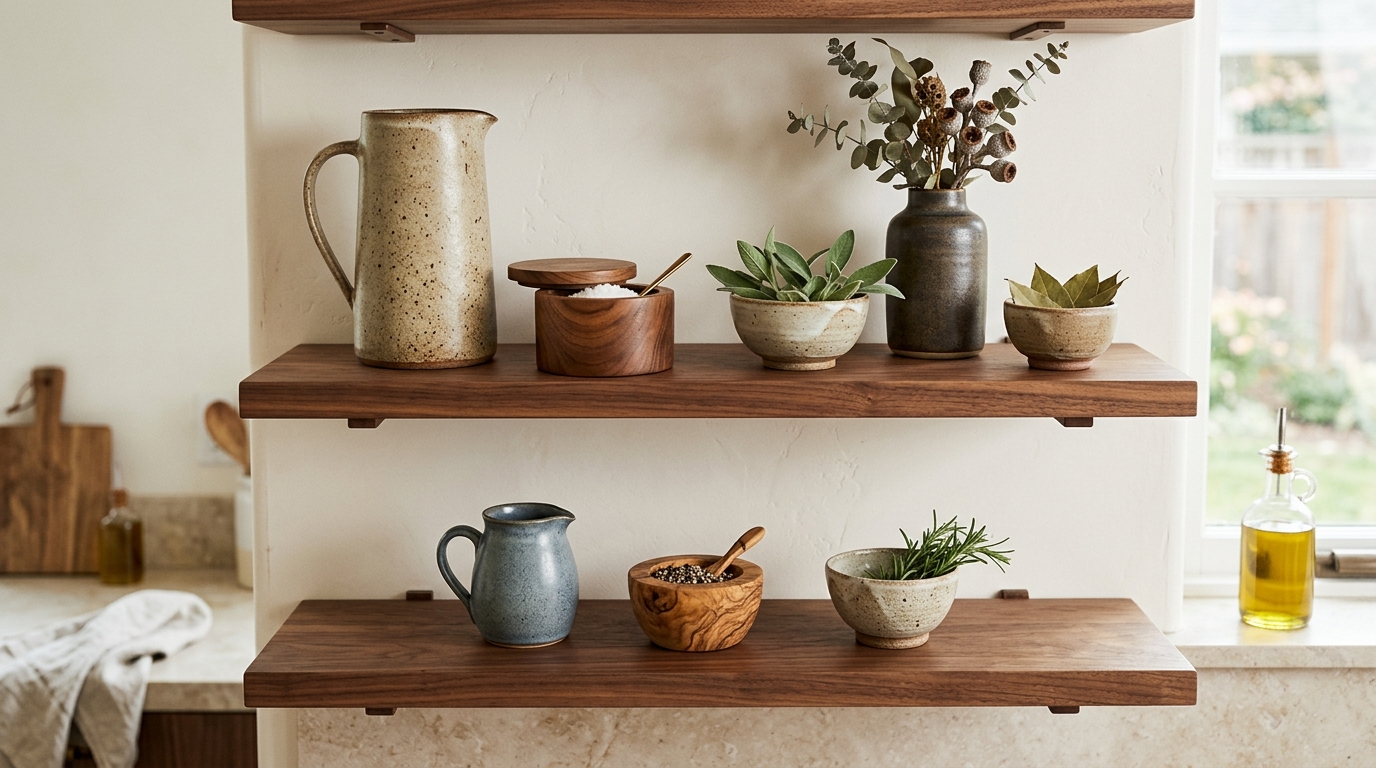
When you place objects in even pairs, the human eye tends to perceive the arrangement as static, formal, and visually boxy. To create dynamic movement and natural visual rhythm across your shelves, always arrange your decorative objects and dishware stacks in odd numbers – specifically clusters of three or five. For example, group a tall stoneware pitcher, a medium wooden salt cellar, and a small ceramic spice bowl together on one shelf corner. Varying the heights and silhouettes within these odd-numbered trios creates a pleasing triangular composition that draws the eye smoothly across the length of the wood board.
4. Decant Dry Goods Into Clear Glass Jars
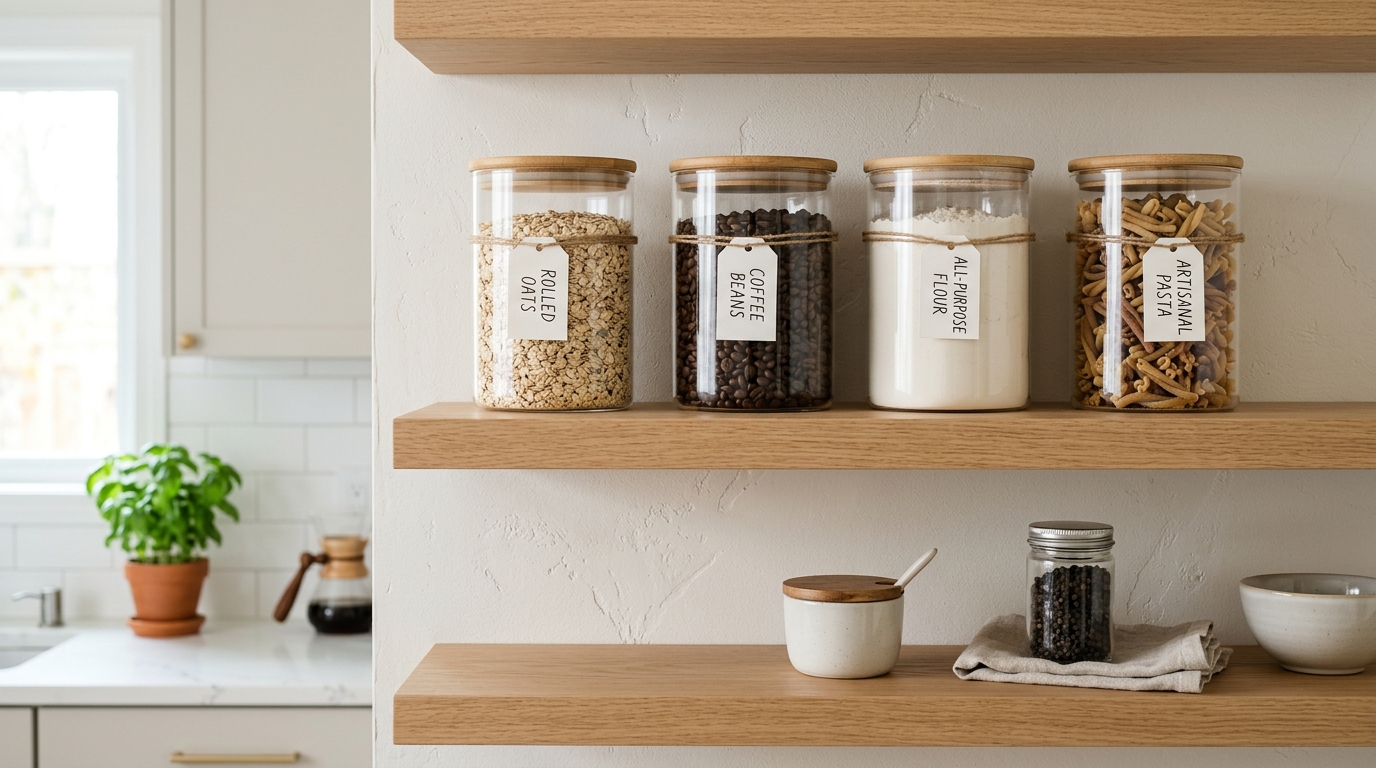
Nothing ruins the clean aesthetic of open kitchen shelving faster than brightly colored cardboard cereal boxes, flour bags, and plastic pasta bags. Take control of your visual clutter by decanting your pantry staples into matching glass canisters or glass jars with airtight lids. Filling clear vessels with rolled oats, coffee beans, white flour, and rigatoni pasta turns everyday dry goods into natural, earthy textural elements that enhance your decor. Operating on the same organizational principles as practical pantry setups, using uniform glass containers brings an immediate sense of order and cleanliness to your wall while keeping ingredients fresh and easily visible.
5. Layer Cutting Boards Against the Back Wall
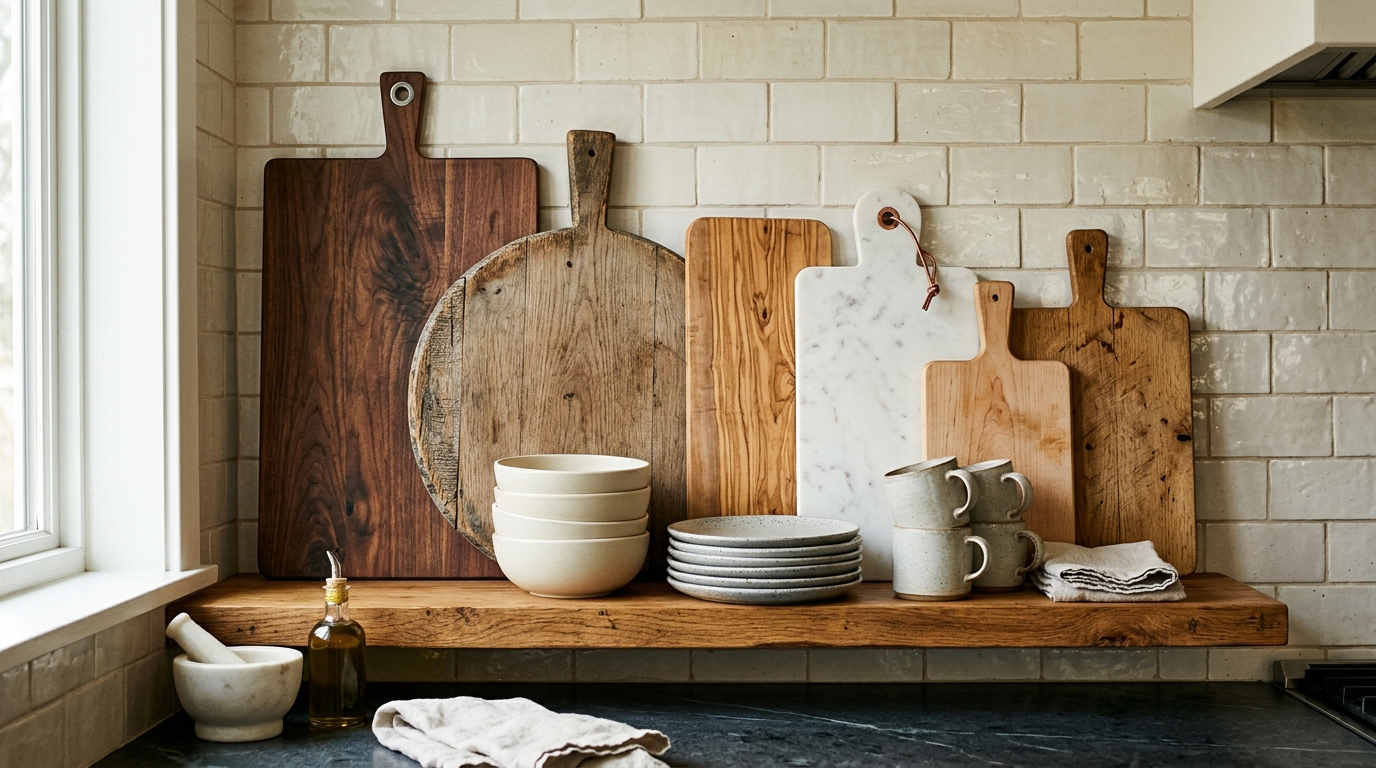
When styling horizontal shelves, people often forget to utilize the vertical wall space directly behind their shorter cups and bowls. Leaning a collection of wooden and marble cutting boards against the back backsplash wall adds crucial vertical height, warmth, and structural depth to your arrangement. Look for boards made from rich walnut, acacia, or weathered oak with interesting handle shapes or leather hanging straps. These tall boards act as a beautiful, rustic backdrop that breaks up large expanses of tile or plain drywall, giving your shelving unit a layered, multi-dimensional appearance that feels collected over time.
6. Introduce Living Greenery With Trailing Plants
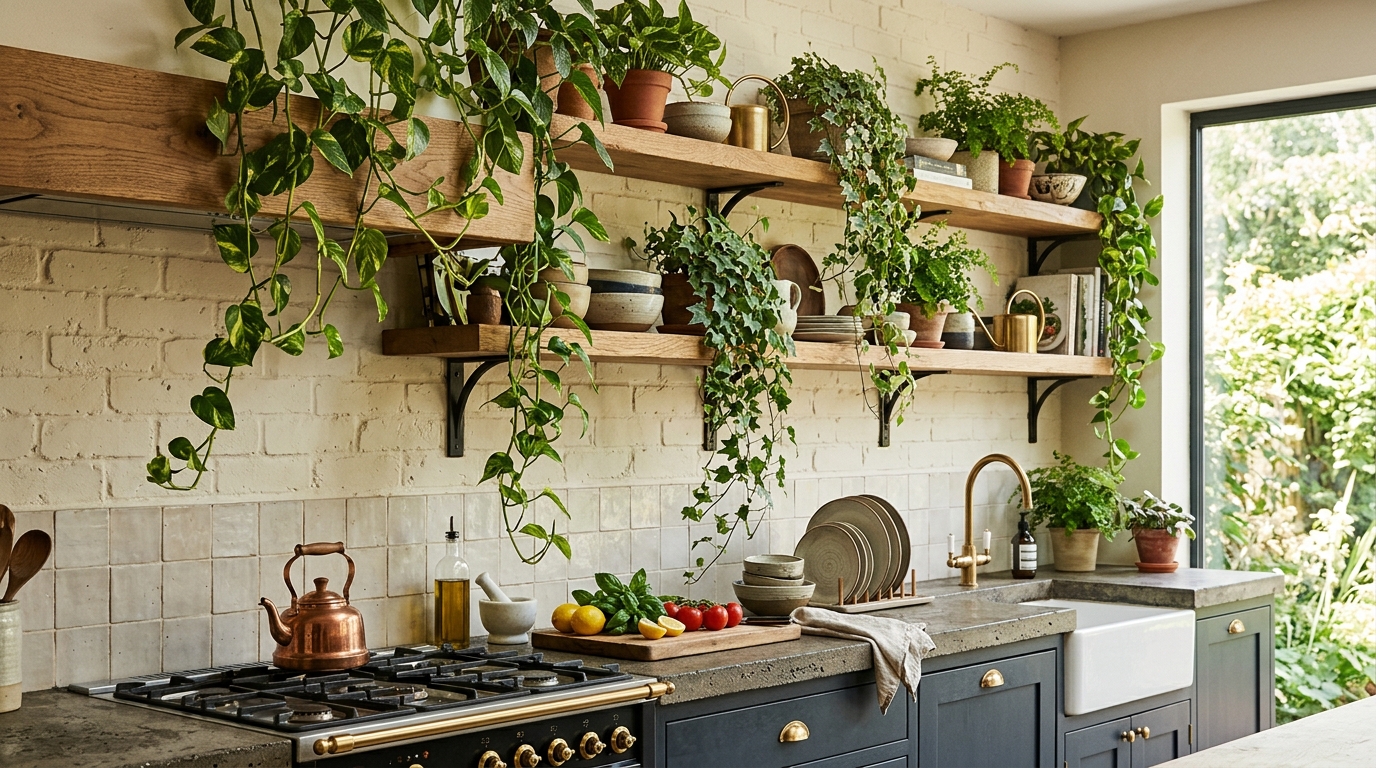
Kitchens are inherently filled with hard, cold surfaces like stone countertops, stainless steel appliances, and ceramic tile backsplashes. Adding living houseplants to your upper shelves introduces essential organic warmth, vibrant color, and soft curvature that counteracts those rigid architectural lines. Trailing plants like golden pothos, English ivy, or heartleaf philodendron are perfect choices because their vines cascade gracefully over the edges of the shelf boards. You can also incorporate potted culinary herbs like rosemary, thyme, or sweet basil on lower sunny shelves, giving you fresh garnishes within easy arm’s reach while you cook dinner.
Tip: Always place your shelf plants inside decorative outer pots without drainage holes, or use deep terracotta saucers, to prevent excess watering from dripping down onto your dry goods and clean dishware below.
7. Anchor With Heavier Items on the Bottom Shelf
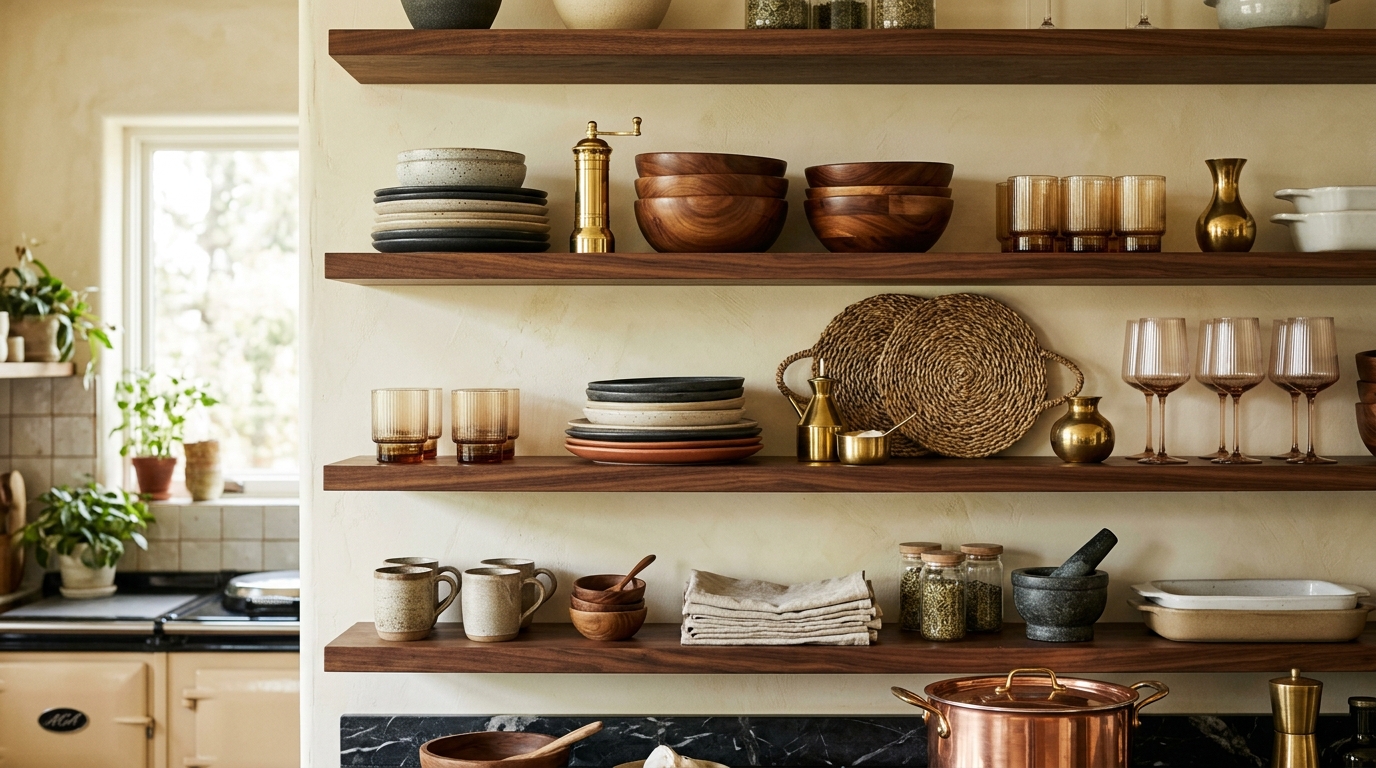
Visual weight matters just as much as physical weight when arranging open storage in a high-traffic room. Placing massive, bulky items on your highest shelves makes the entire wall look top-heavy, precarious, and visually overwhelming. Instead, anchor your layout by placing your heaviest pieces – such as enameled cast-iron Dutch ovens, large wooden salad bowls, and thick ceramic mixing bowls – on the lowest shelf directly above your countertop. This thoughtful placement grounds the overall arrangement while making heavy cookware significantly safer and easier to lift down when you are preparing large family meals.
8. Mix Materials Like Brass, Wood, and Ceramic
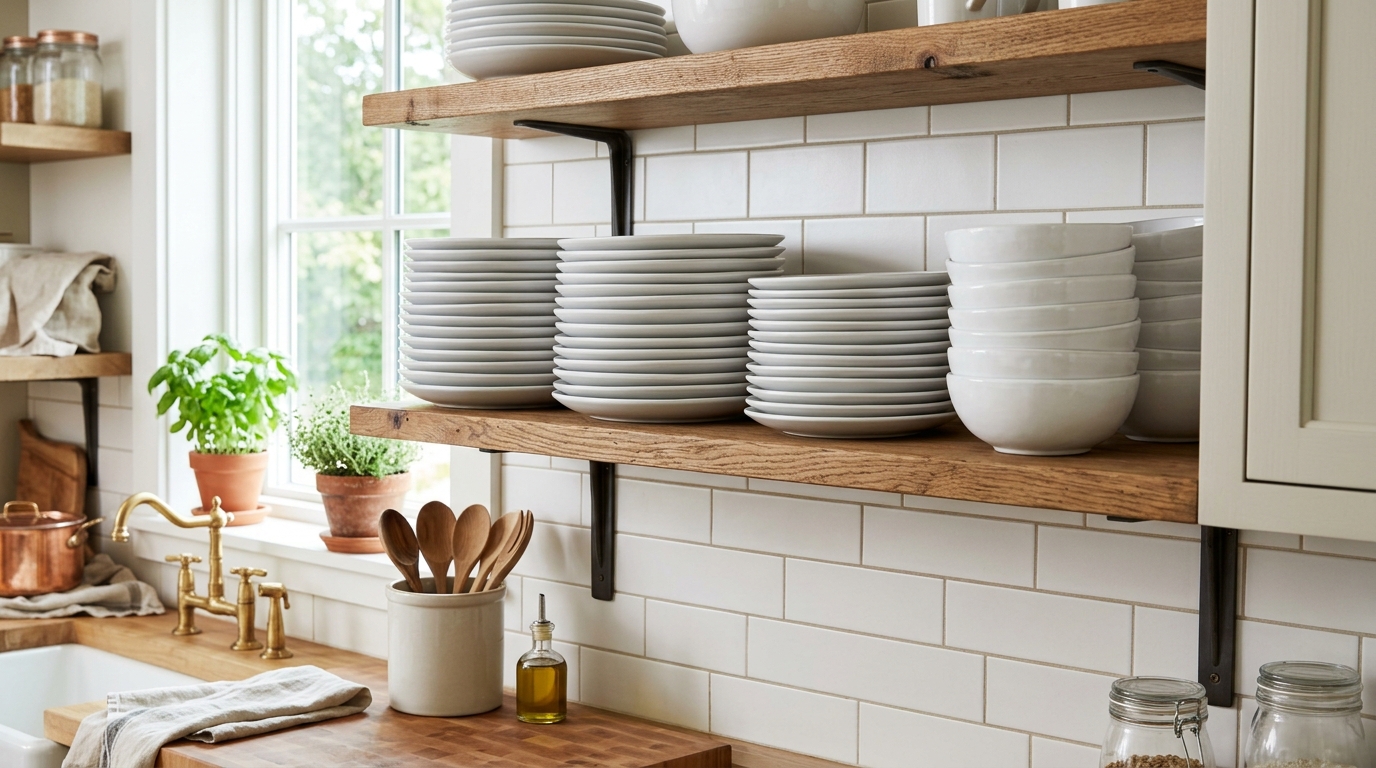
A shelf filled exclusively with white ceramic plates can quickly look sterile and flat, lacking the tactile richness that makes a kitchen feel welcoming. To build genuine depth and interest, intentionally mix contrasting materials and textures across every single horizontal level. Combine smooth stoneware dinner plates with warm wooden serving bowls, shiny brass pepper mills, woven seagrass trivets, and ribbed glassware. Much like balancing finishes on marble kitchen surfaces, introducing diverse materials ensures your shelves catch the light differently throughout the day and offer an engaging, custom-designed aesthetic.
9. Display Stacked Dishware for Restaurant Charm
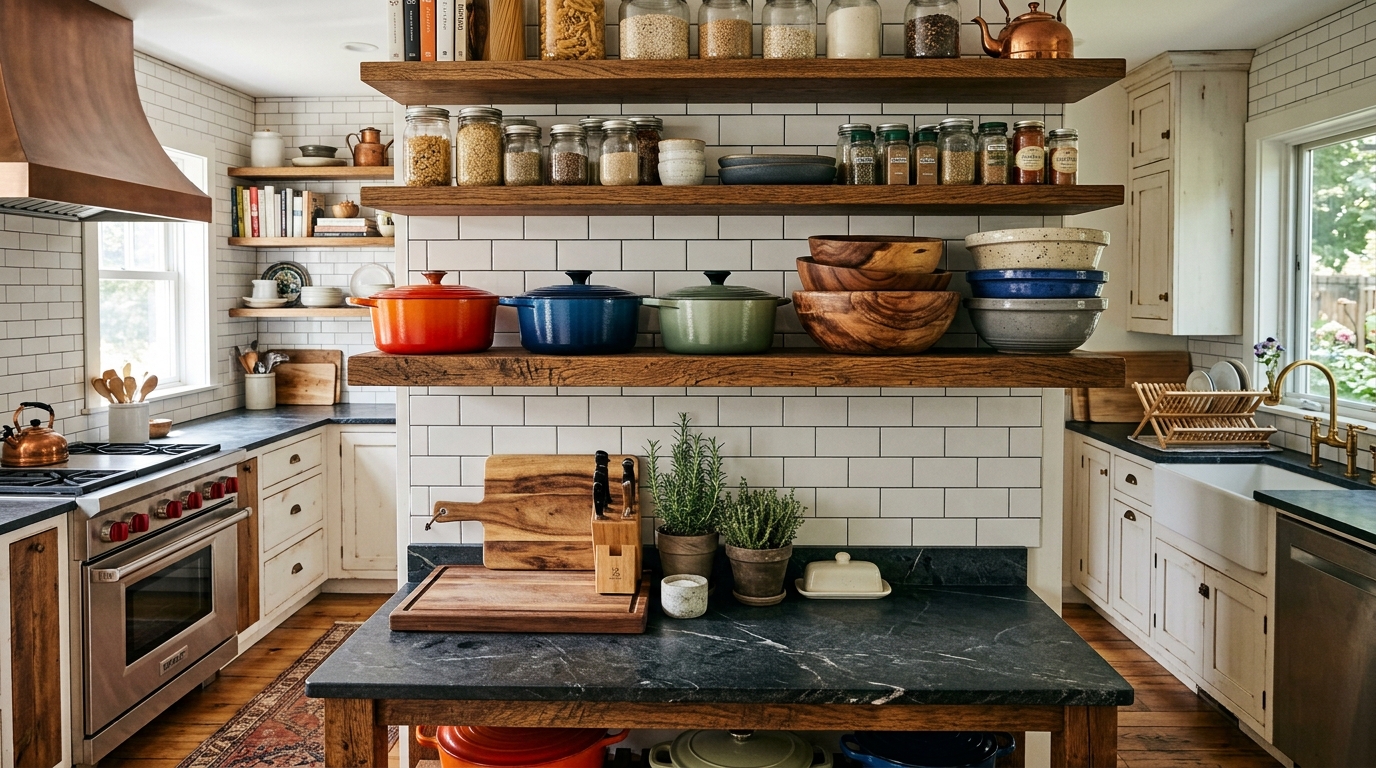
There is something incredibly charming and appetizing about seeing neat stacks of everyday dishware ready for service on an open kitchen shelf. Instead of hiding your plates away, embrace a casual, bistro-inspired aesthetic by stacking your dinner plates, salad plates, and soup bowls directly out in the open. To keep the stacks looking neat rather than haphazard, align the edges cleanly and limit each stack to roughly six or eight items so they remain stable. This approach makes setting the dinner table effortless for children and guests, while showcasing the beautiful glazes of your favorite everyday ceramics.
10. Lean Small Framed Artwork and Vintage Prints
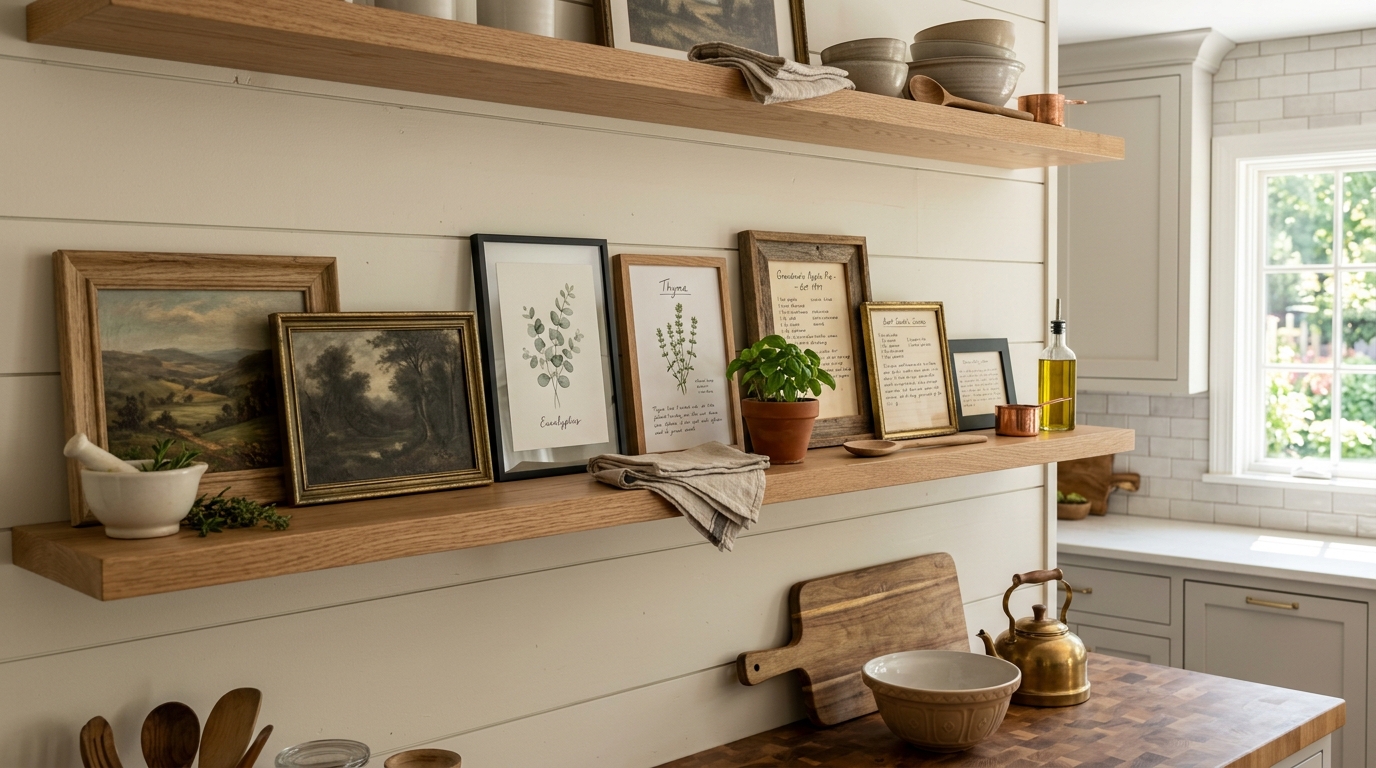
You do not need to limit your wall art to hallways and living rooms; incorporating artwork onto your kitchen shelves brings wonderful personality and warmth to your culinary space. Lean small framed vintage landscape oil prints, botanical illustrations, or handwritten family recipe cards against the back wall of your shelves. Choose frames made from natural oak, weathered brass, or simple matte black metal to complement your existing kitchen hardware. This unexpected artistic touch softens the utilitarian nature of the room and makes your cooking zone feel like an integrated, cozy extension of your primary living areas.
11. Use Woven Baskets to Hide Small Clutter
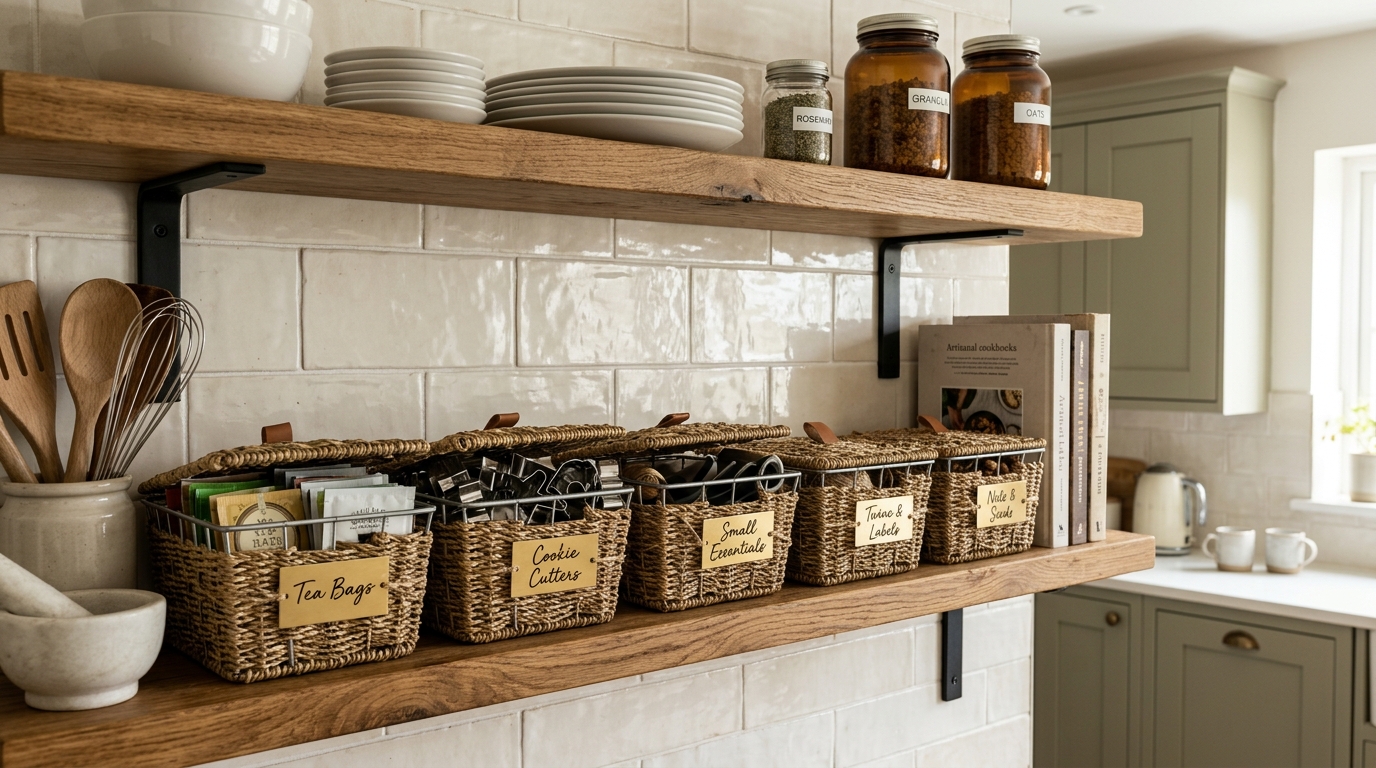
Even the most disciplined minimalist homeowner has small, unsightly kitchen items that need to be stored away, such as tea bags, cookie cutters, bottle stoppers, and extra dish sponges. Instead of cluttering your open boards with these tiny items, use small woven seagrass, wire, or felt storage baskets to corral them neatly out of sight. Place a matching pair of lidded baskets on a middle shelf to hold all your loose odds and ends. Taking inspiration from organized bedside table styling, using decorative containers keeps essential small items easily accessible without ruining the clean visual lines of your open storage.
12. Incorporate Sconce Lighting Above the Top Shelf
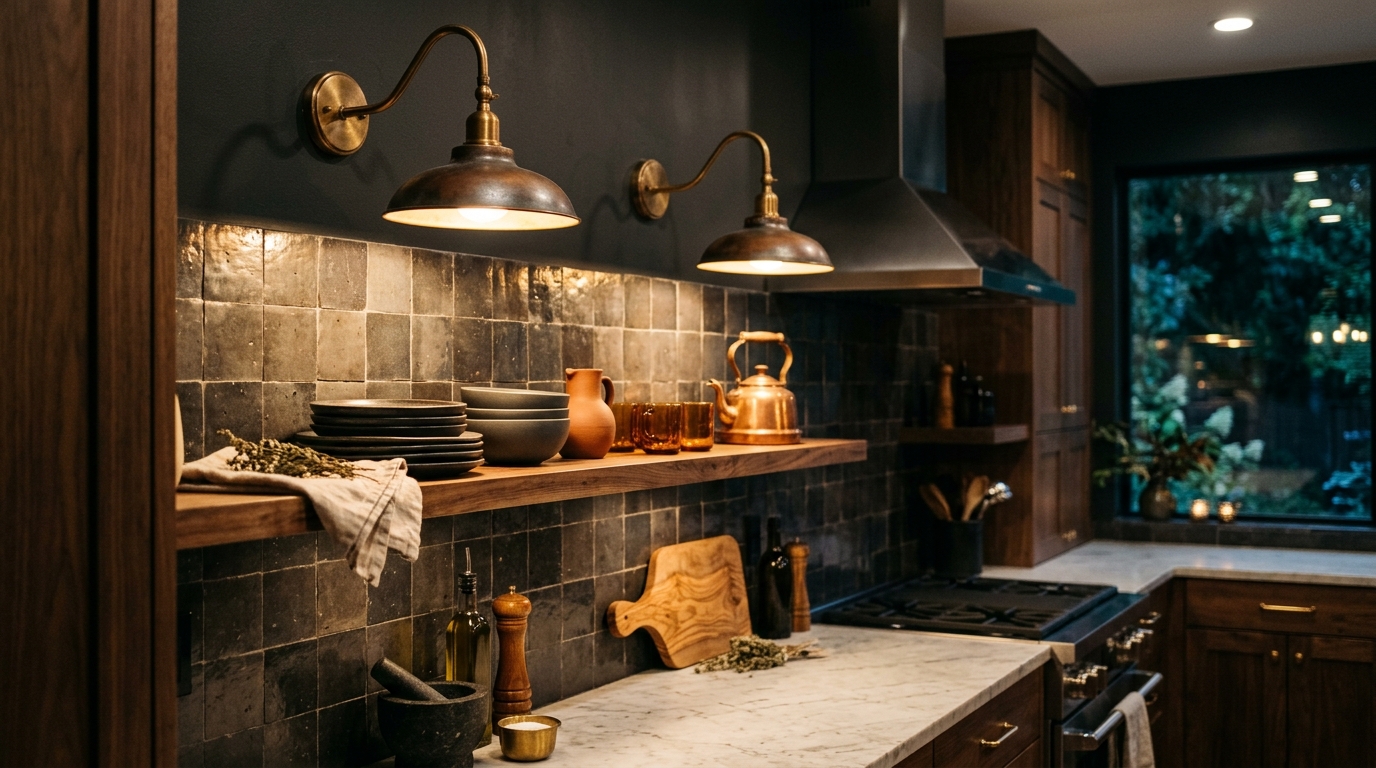
Lighting is the ultimate secret weapon for transforming basic kitchen shelves into a dramatic, high-end architectural focal point during the evening hours. Installing hardwired brass or matte black wall sconces directly above your top shelf casts a warm, downward pool of light that illuminates your styled dishware and highlights your backsplash texture. If hardwiring new electrical fixtures is not an option in your current layout, attach battery-operated, rechargeable LED puck lights underneath the bottom shelves to create a soft, ambient glow over your kitchen countertops without needing any drywall repairs or electrician bills.
13. Leave Plenty of Negative Space
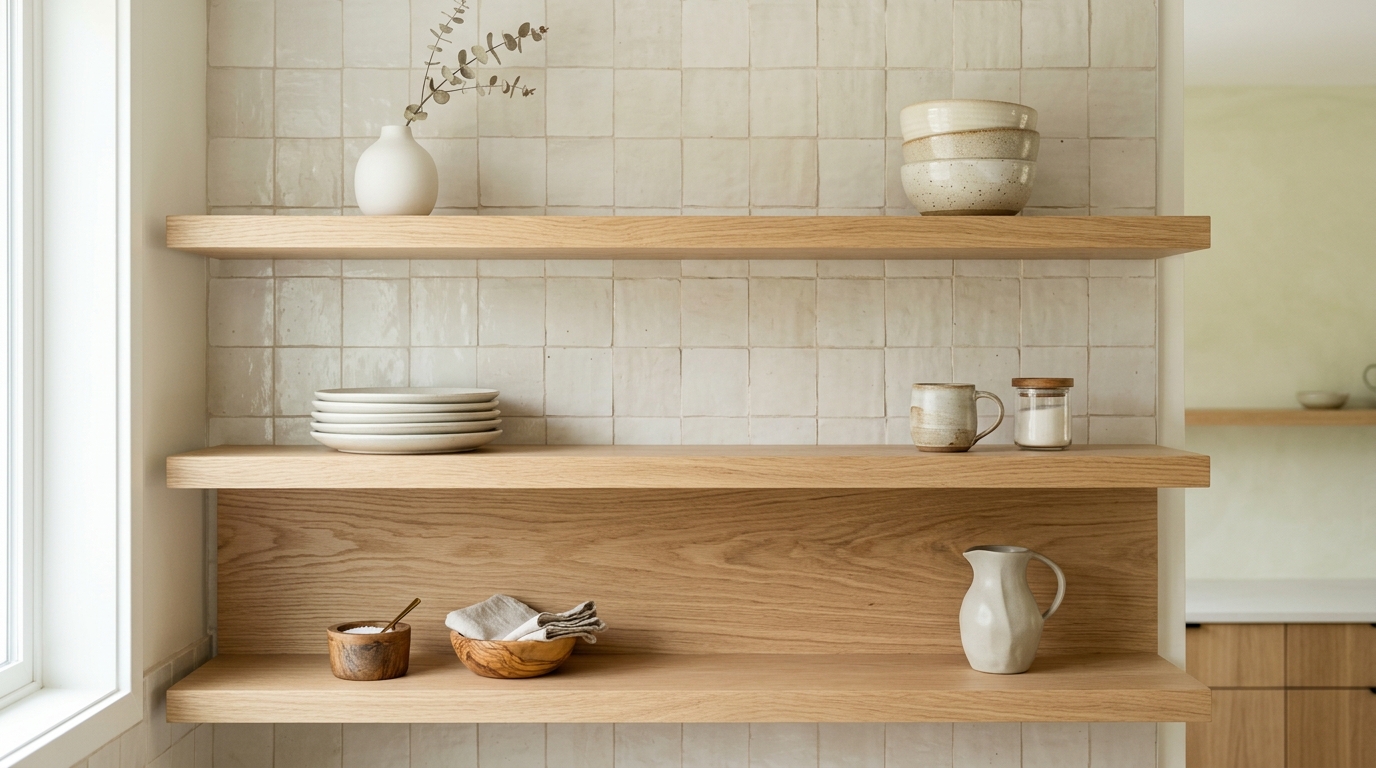
When you have limited storage in your kitchen, the temptation is to pack every available inch of shelf space with cups, bowls, and pantry items. However, overcrowding your shelves creates visual noise that makes the entire room feel cramped, stressful, and messy. Resist the urge to fill every gap; intentionally leave open pockets of negative space between your decorative groupings and stacks of plates. Allowing bare wood or tile to show through gives your eyes a place to rest and ensures that the items you do choose to display look like special, curated objects rather than cramped clutter.
14. Show Off Cookbooks With Decorative Bookends
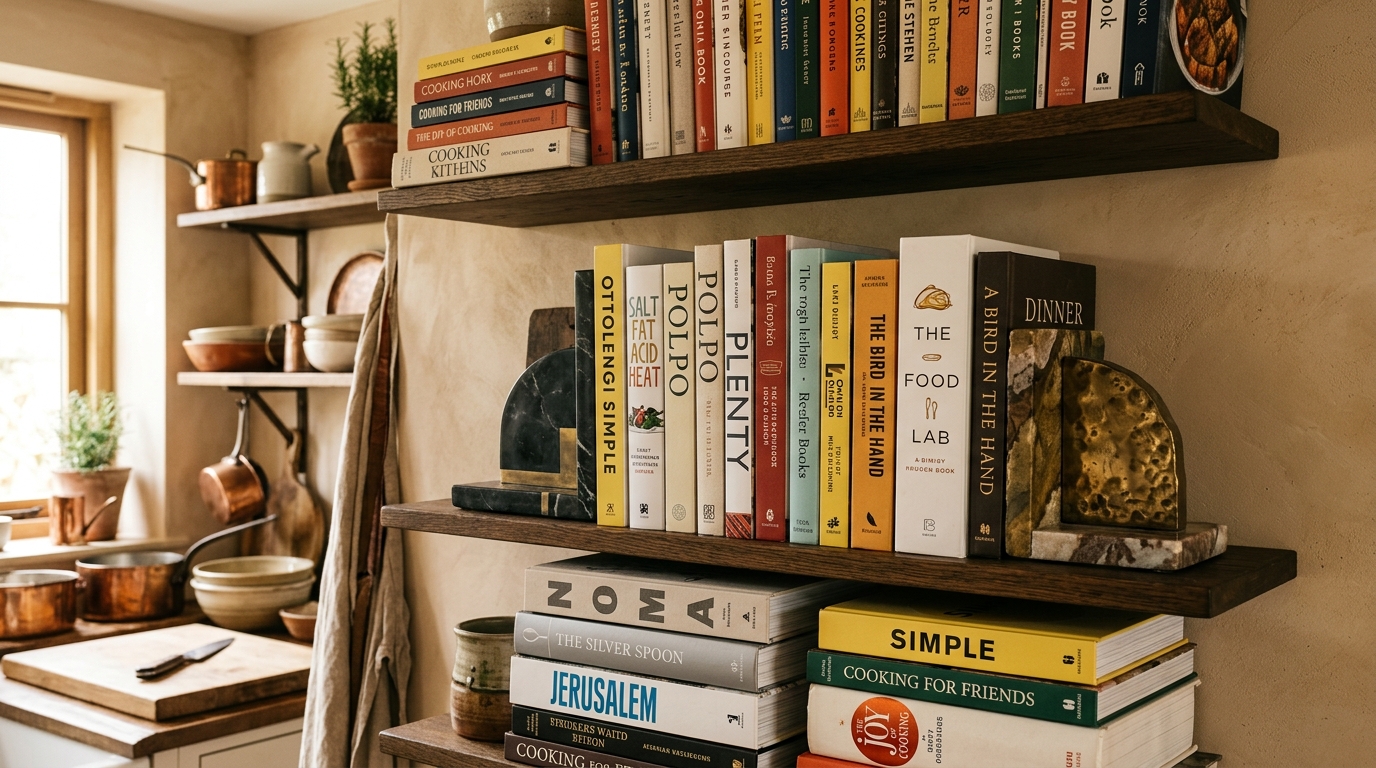
Your favorite cookbooks deserve better than being shoved into a dark pantry or hidden inside a messy bottom drawer. Turn your culinary collection into a vibrant design feature by displaying hardback cookbooks directly on your open shelves. Stack them horizontally to create a sturdy pedestal for a small bowl or candle, or stand them vertically using heavy marble, brass, or stone bookends. The colorful spines of classic cookbooks introduce warmth, texture, and intellectual charm to the kitchen, while keeping your favorite weeknight recipes right where you need them when meal planning begins.
15. Hide Unsightly Brackets With Custom Floating Wood
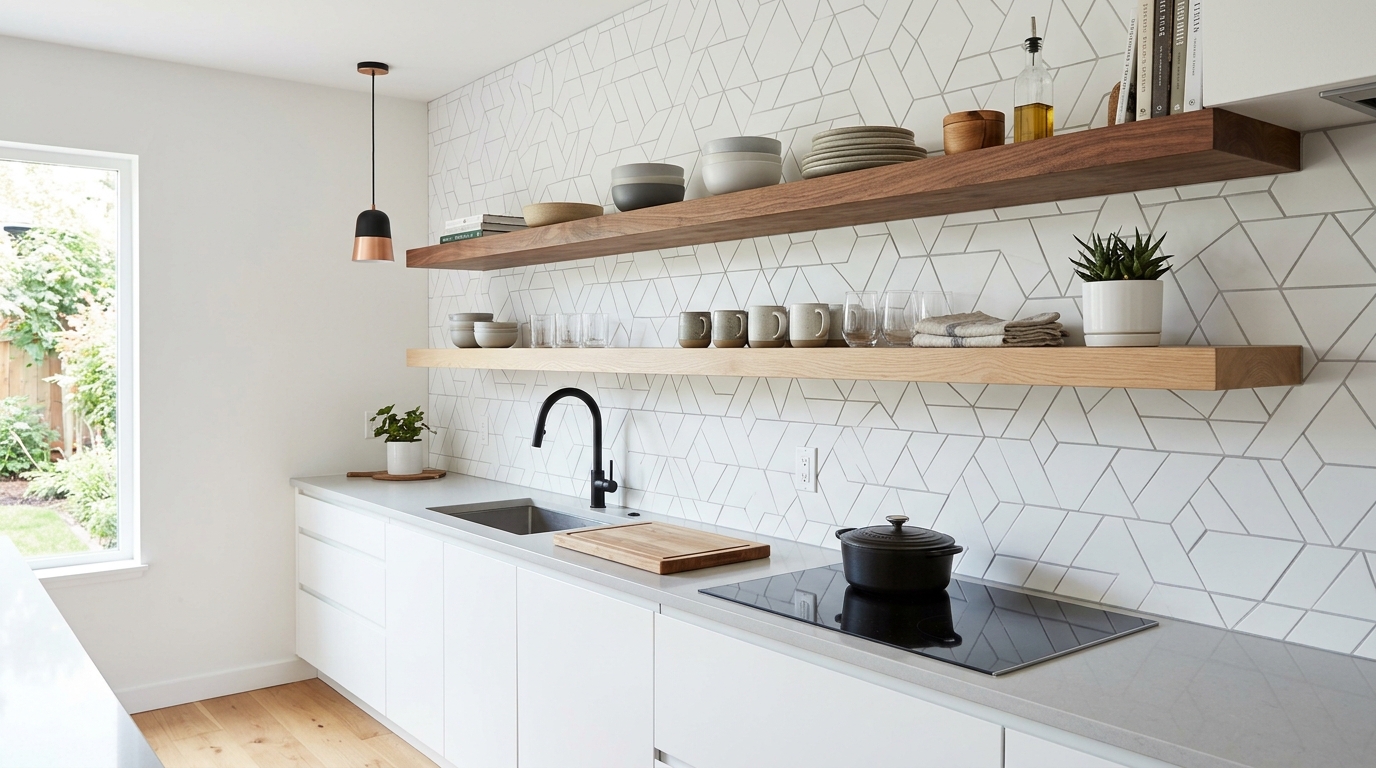
The style of shelf support you choose plays a massive role in the overall vibe of your kitchen interior. For a clean, modern, or Scandinavian-inspired look, choose thick floating shelves made from white oak, maple, or walnut that utilize hidden internal bracket rods drilled directly into your wall studs. This concealed hardware installation creates a seamless, built-in appearance that allows the natural wood grain to take center stage against your tile backsplash. Aligning your wood selections with classic tile arrangements ensures the horizontal floating boards look like a intentional architectural feature of your kitchen walls.
16. Hang Mugs From Under-Shelf Brass Hooks
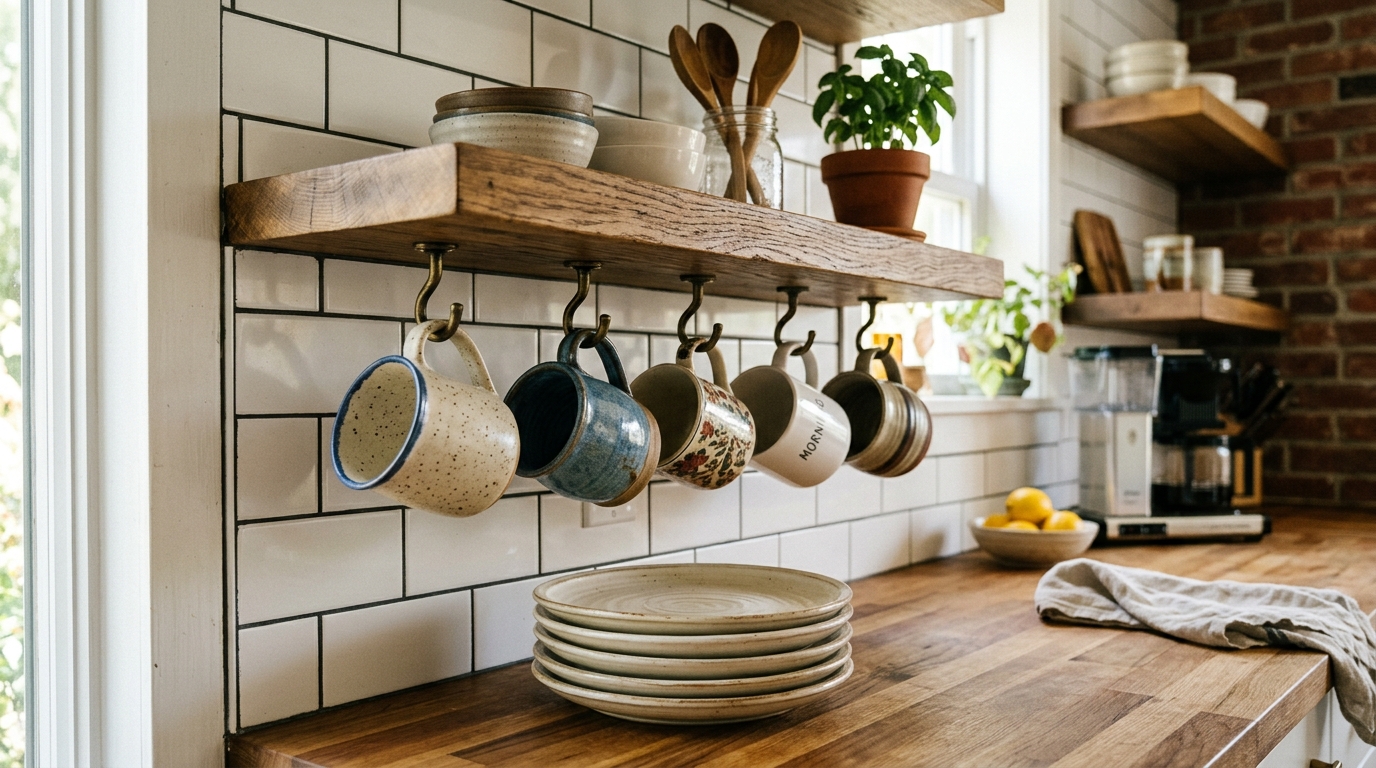
If you are running out of horizontal surface area on your shelf boards, look underneath them for bonus storage opportunities. Screwing small, sturdy brass or black iron cup hooks into the underside of your lowest kitchen shelf allows you to hang your favorite coffee mugs by their handles. This smart spatial trick instantly frees up valuable board space for larger plates and bowls while turning your mug collection into a charming, cottage-style hanging display. Make sure to space the hooks roughly four inches apart so your mugs do not clink together and chip when you grab one for your morning coffee.
17. Style With Functional Copper and Cast Iron Cookware
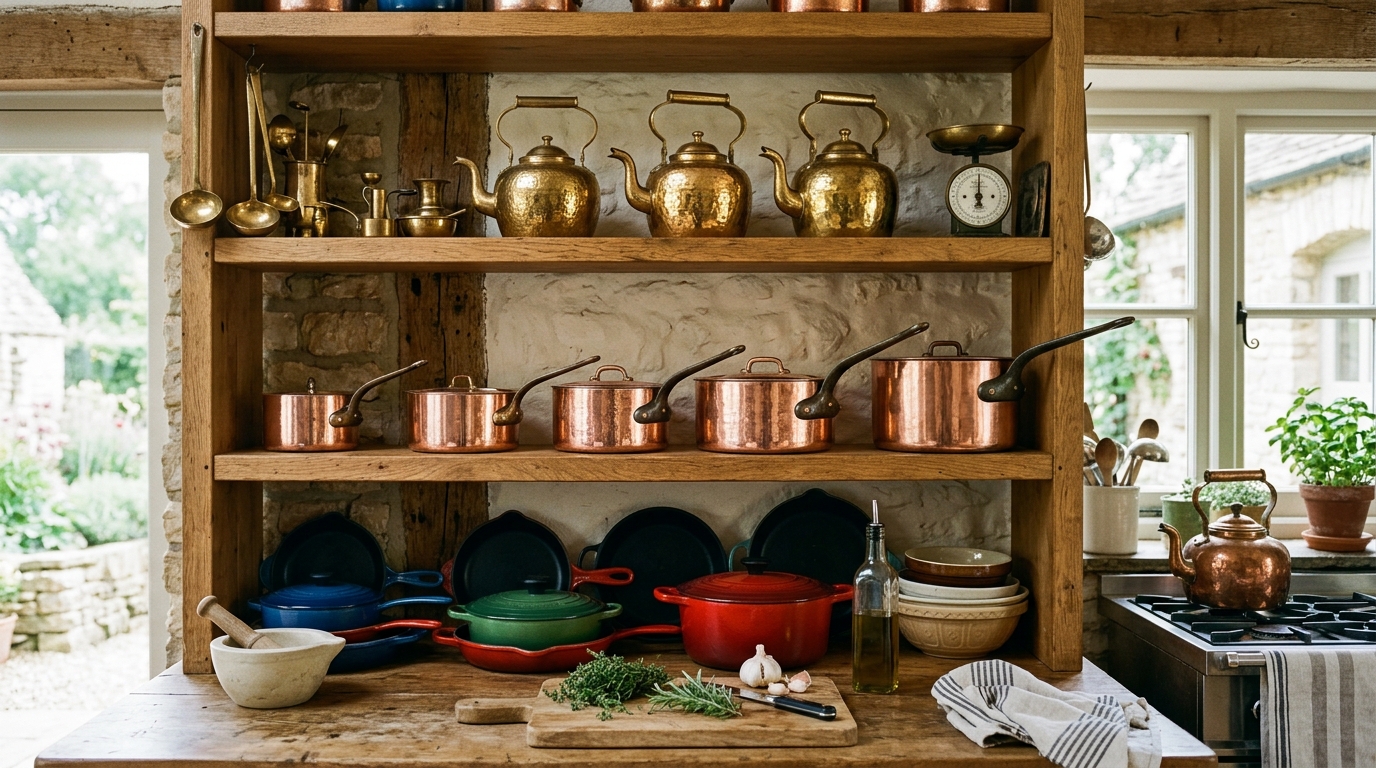
Why hide expensive, beautifully crafted cookware inside dark base cabinets when it can double as high-end kitchen decor? Dedicate a section of your open shelving to showcasing your finest culinary tools, such as gleaming copper saucepans, enameled cast-iron skillets, and hammered brass kettles. The metallic sheen of copper and brass introduces rich, historical warmth that contrasts beautifully against simple white dishware and natural wood boards. Let your favorite functional cooking tools act as statement art pieces, bringing an authentic, professional-chef atmosphere to your everyday home kitchen.
18. Keep Everyday Items Within Easy Arm’s Reach
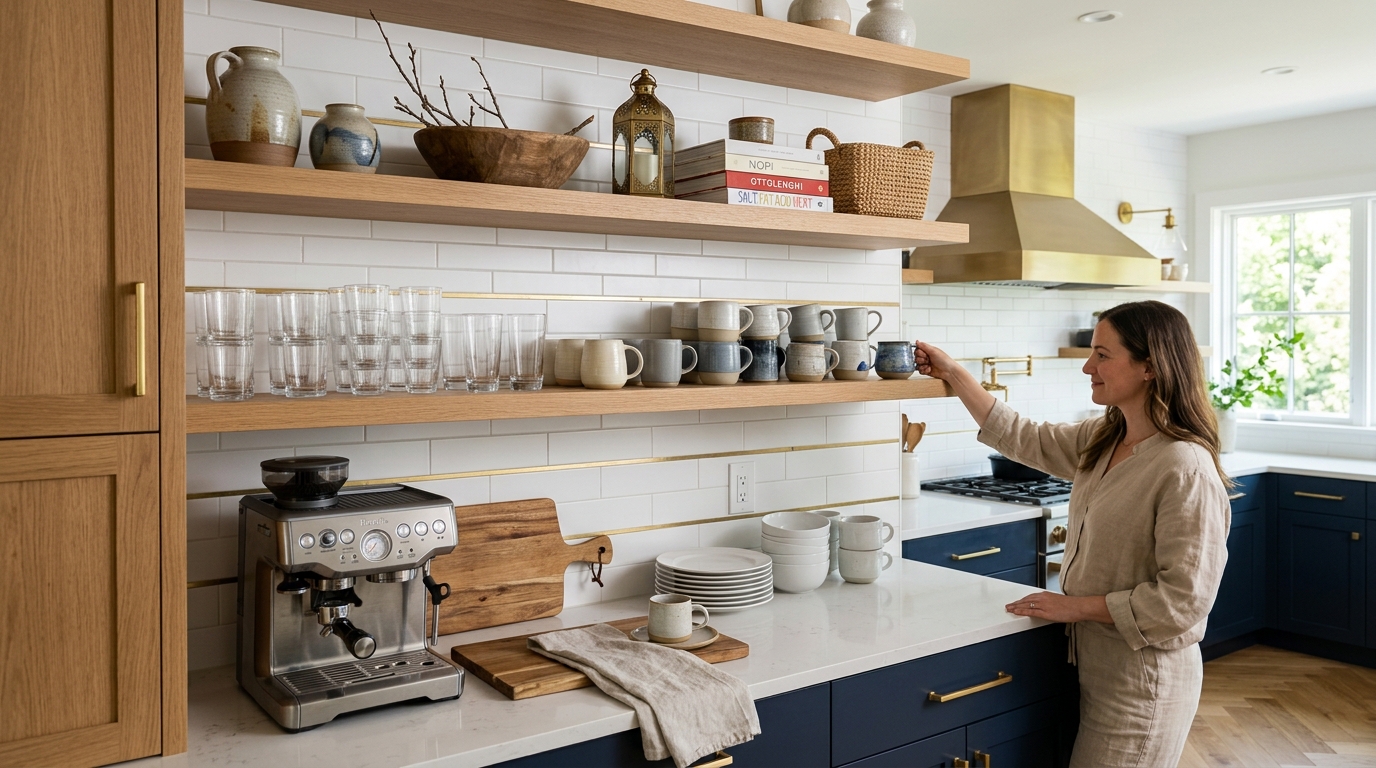
A beautifully styled shelf is completely useless if you have to pull out a step stool every single time you need a water glass or a cereal bowl. Practice smart kitchen ergonomics by arranging your shelves according to daily frequency of use. Keep your everyday drinking glasses, coffee mugs, and dinner plates on the lowest shelf located directly between eye level and arm’s reach. Reserve the higher, harder-to-reach shelves for lightweight decorative objects, seasonal holiday platters, and specialty glassware that you only use when hosting dinner parties. Borrowing layout concepts from relaxing office wall-colors, designing for everyday comfort makes your space enjoyable to use.
19. Add Subtle Texture With Ribbed and Fluted Glassware
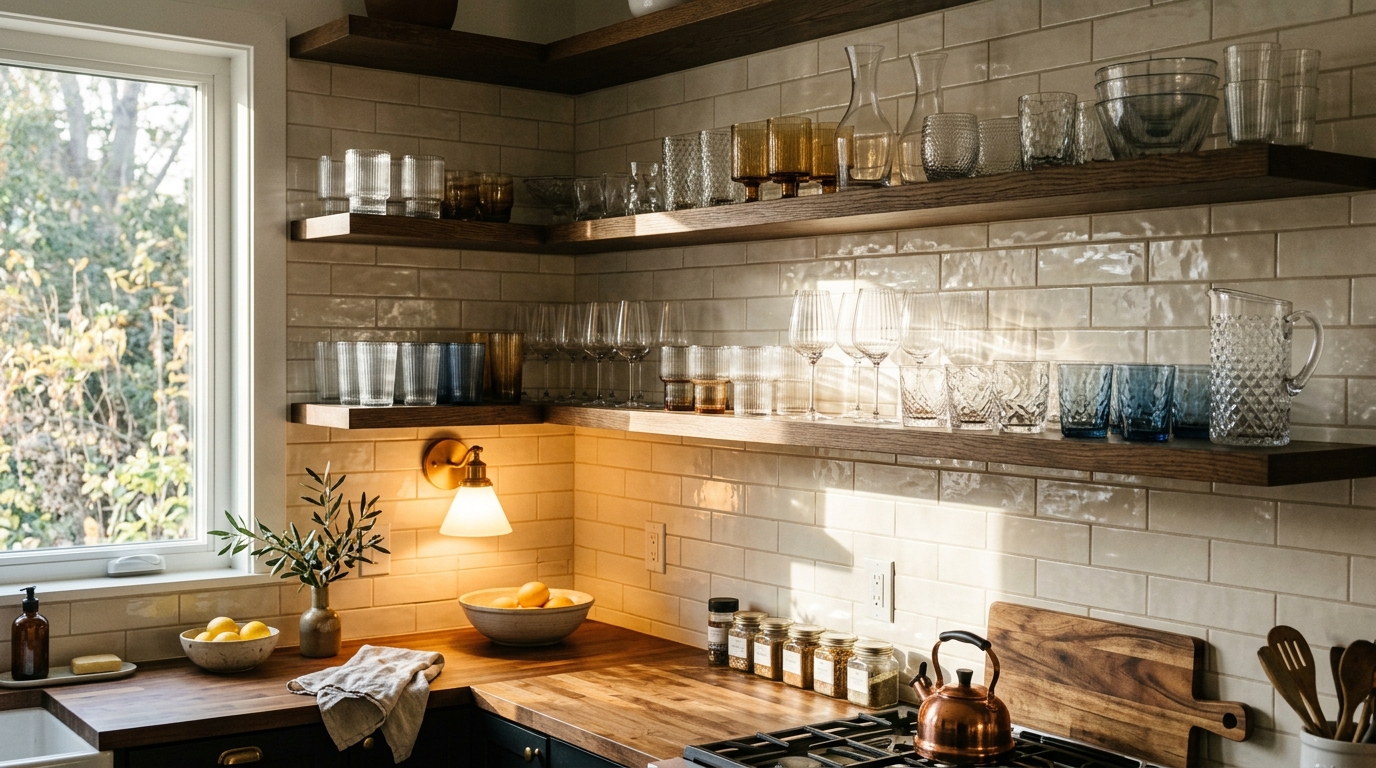
Glassware is an essential component of kitchen storage, but basic plain glass tumblers can sometimes get lost visually against white walls and light backsplashes. Upgrade your shelf display by swapping out basic glasses for ribbed, fluted, or textured glassware collections. Vintage French wine glasses, crystal decanters, and ribbed highball glasses catch natural sunlight during the day and lamp glow at night, throwing beautiful, intricate light patterns across your backsplash. The subtle texture of fluted glass adds instant elegance and visual depth without introducing distracting colors into your neutral shelf arrangement.
20. Create a Dedicated Coffee or Tea Bar Station
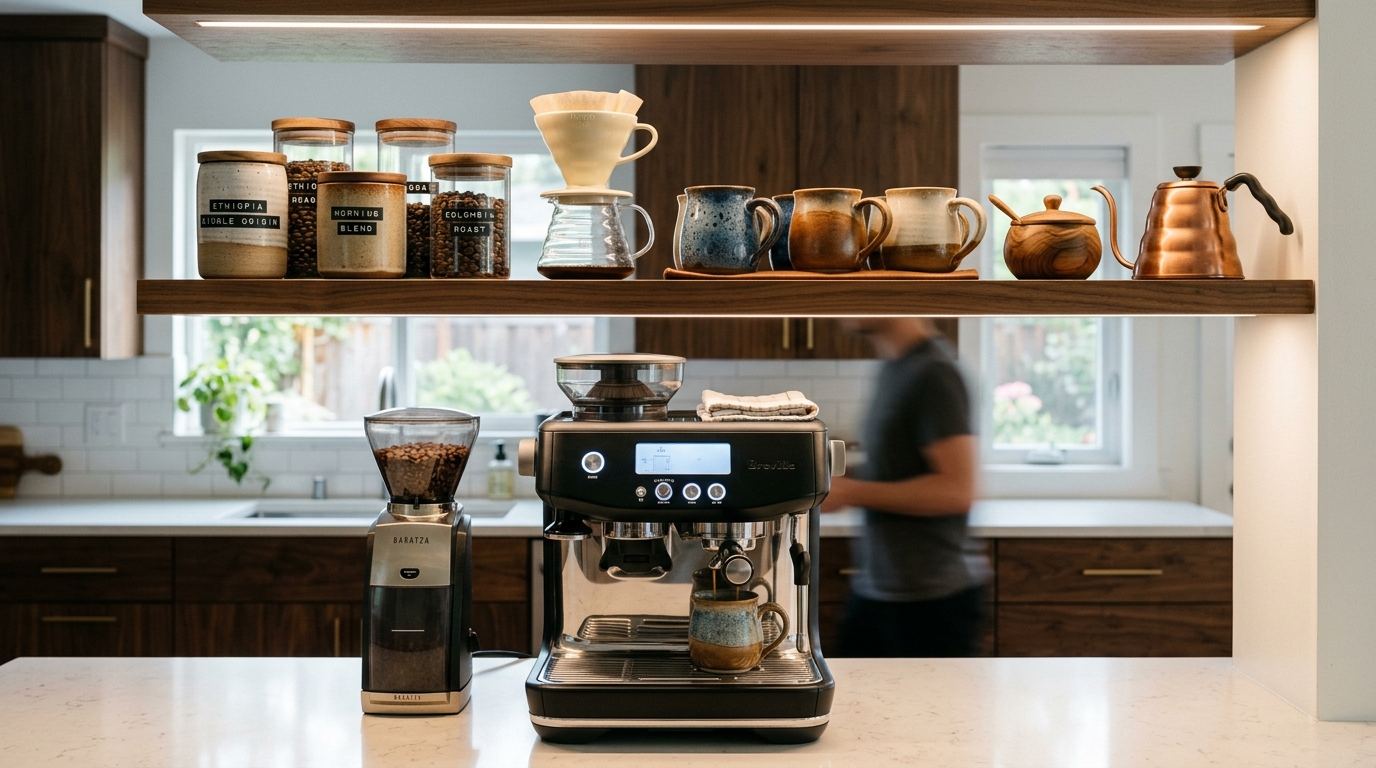
If you love your morning caffeine routine, use a section of your open shelving to build a dedicated, personalized coffee or tea station. Group your coffee bean canisters, a ceramic pour-over dripper, your favorite stoneware mugs, and a small wooden sugar bowl together on one specific shelf zone positioned directly above your coffee maker. This intentional grouping creates a functional morning destination within your kitchen that speeds up your routine while looking charming and organized. Similar to creating relaxing backyard dining spaces, designing specialized micro-zones in your kitchen makes daily living feel smoother and more luxurious.
21. Play With Asymmetrical and Unconventional Layouts
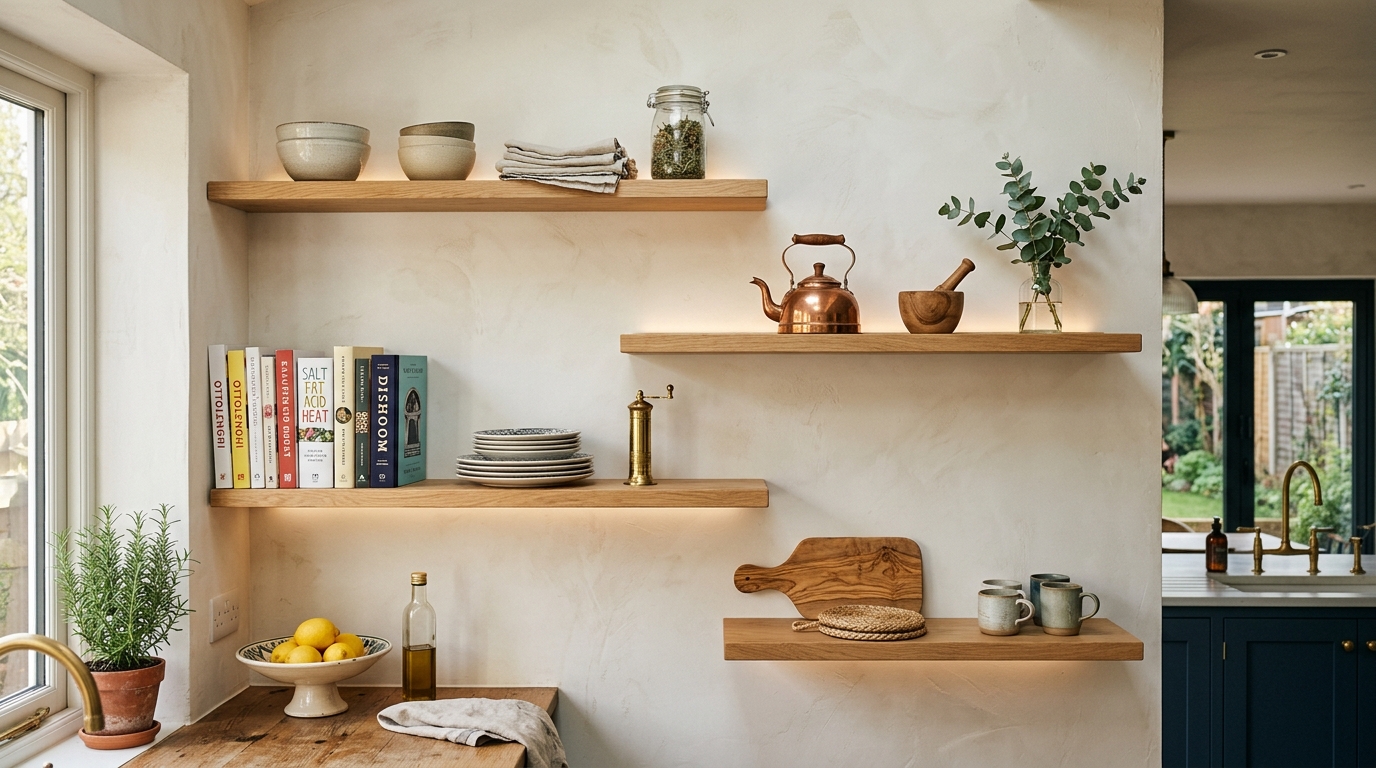
Many homeowners fall into the trap of trying to mirror the exact same arrangement on both sides of their shelving unit, resulting in a stiff, predictable display. Instead of forcing strict symmetry, experiment with an asymmetrical layout that balances visual weight across the entire wall diagonally. For example, if you place a heavy stack of white dinner plates on the bottom left shelf, balance that weight by placing a tall ceramic pitcher and a trailing pothos plant on the top right shelf. This relaxed, offset styling technique creates a modern, organic flow that keeps your eyes moving across the space.
22. Change Out Decorative Accents With the Seasons
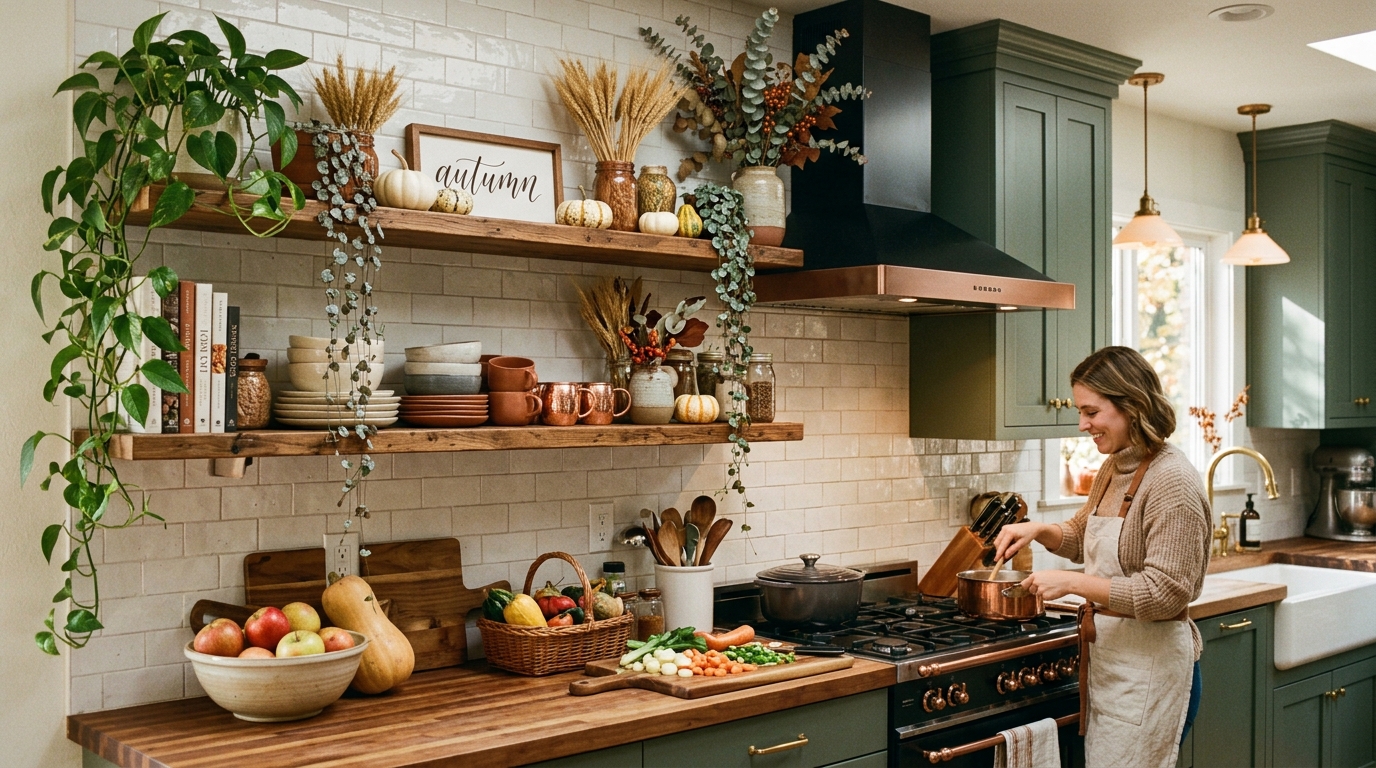
One of the greatest advantages of open kitchen shelving is how easily and affordably you can update the entire mood of your room without spending money on renovations. Keep your kitchen feeling fresh and celebratory year-round by rotating small decorative accents on your upper shelves as the seasons change. In the spring, introduce fresh cut daffodils in a glass jar; in the autumn, add a few miniature white pumpkins or dried wheat stalks; during winter, drape aromatic cedar greenery or pine cones across the boards. Drawing inspiration from seasonal spa bathroom renovations, simple seasonal swaps keep your home feeling dynamic and inviting.
Tip: Store your out-of-season decorative shelf items inside a single labeled bin in your pantry or basement so you can swap out accents in under ten minutes whenever the weather changes.
Final Thoughts on Kitchen Shelf Styling
Mastering the art of kitchen shelf styling is ultimate proof that functional storage and beautiful home decor can exist in perfect harmony. By establishing a cohesive three-color palette, grouping items in odd numbers, and mixing tactile materials like natural wood, brass, and stoneware, you can transform bare wooden boards into a stunning focal point. Remember to prioritize daily ergonomics by keeping your most-used plates and mugs within easy arm’s reach while leaving plenty of negative space so the arrangement can breathe. Start small by decanting your dry goods into clear jars, adding a trailing houseplant, and enjoying a kitchen space that feels both organized and deeply personal every single day.
Frequently Asked Questions
How do I keep open kitchen shelves from getting dusty or greasy?
To keep shelves clean, install a high-powered exhaust range hood and run it whenever you cook on the stove to pull airborne grease out of the room. Additionally, place your most frequently used everyday dishes on the bottom shelves so they are constantly being washed and cycled through, reserving high shelves for items you can easily wipe down once a month.
What is the best rule for decorating floating kitchen shelves?
The most reliable decorating standard is the 60/40 rule, where 60% of your shelf space is dedicated to daily functional items like glasses and bowls, and 40% is reserved for decorative pieces like art and plants. Always group your smaller items in odd numbers – such as trios of varying heights – to create natural visual balance and movement across the wood boards.
How much weight can a floating kitchen shelf hold?
The weight capacity of a floating shelf depends entirely on the hardware used and whether the internal mounting brackets are anchored securely into solid wooden wall studs. A professionally installed, heavy-duty floating wood shelf anchored into wall studs can typically support between 40 and 50 pounds, making it safe for stacks of ceramic plates and cast-iron cookware.
Should kitchen shelves match the cabinets or the countertops?
There is no strict rule; matching shelves to your base cabinets creates a seamless, built-in look, while matching wood shelves to your hardwood floors or butcher block countertops adds wonderful natural warmth. In modern kitchens with painted cabinets, installing contrasting natural white oak or walnut floating shelves provides a beautiful visual break and textural richness.
We would love to help you continue elevating every single room in your house with professional confidence – head over to our main blog for more decorating inspiration and expert home advice. Make sure to bookmark this article, share it with a friend who is remodeling their kitchen, and start creating the beautifully organized, functional shelving display you deserve today!